Let's go through the process of building a common personal finance chart of accounts using the information we have learned from this chapter. A chart of accounts is simply a new GnuCash file in which you groups your accounts to track your finances. In building this chart of accounts, the first task is to divide the items you want to track into the basic account types of accounting. This is fairly simple, let's go through an example.
Let us assume you have a checking and a savings account at a bank, and are employed and thus receive a paycheck. You have a credit card (Visa), and you pay monthly utilities in the form of rent, phone, and electricity. Naturally, you also need to buy groceries. For now, we will not worry about how much money you have in the bank, how much you owe on the credit card, etc. We want to simply build the framework for this chart of accounts.
Your assets would be the bank savings and checking account. Your liabilities are the credit card. Your Equity would be the starting values of your bank accounts and credit card (we do not have those amounts yet, but we know they exist). You have income in the form of a salary, and expenses in the form of groceries, rent, electricity, phone, and taxes (Federal, Social Security, Medicare) on your salary. Simple, isn't it?
Now, you must decide how you want to group these accounts. Most likely, you want your assets groups together, your liabilities grouped together, your Equity grouped together, your income grouped together, and your expenses grouped together. This is the most common way of building a GnuCash chart of accounts, and it is highly recommended that you always begin this way.
Start with a clean GnuCash file (do not select any predefined accounts) and build this basic starting account structure (File -> New Account...).
Account name Assets (account type Assets, parent account New top level account)
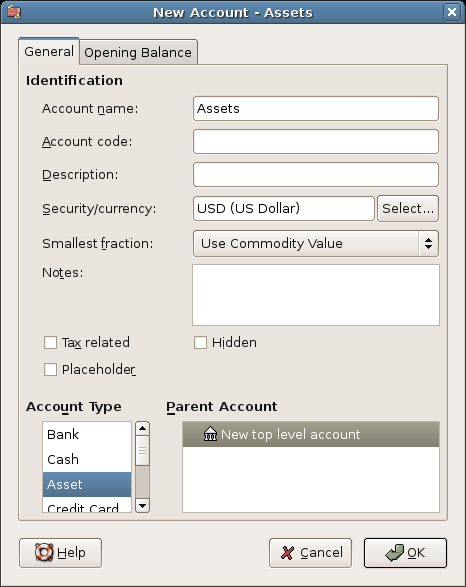
This image shows the dialog to create an asset account
Account name Liabilities (account type Liabilities, parent account New top level account)
Account name Equity (account type Equity, parent account New top level account)
Account name Income (account type Income, parent account New top level account)
Account name Expenses (account type Expenses, parent account New top level account)
When you have created the top-level accounts, the main Account page in GnuCash should look like below
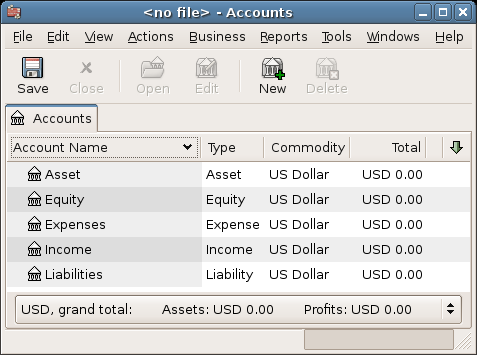
This image shows the basic top-level accounts.
You can now add to this basic top-level tree structure by inserting some real transaction-holding sub-accounts. Notice that the tax accounts are placed within a sub-account named "Taxes". You can make sub-accounts within sub-accounts. This is typically done with a group of related accounts (such as tax accounts in this example).
Account name Checking (account type Bank, parent account Asset)
Account name Savings (account type Bank, parent account Asset)
Account name Visa (account type Credit Card, parent account Liabilities)
Account name Salary (account type Income, parent account Income)
Account name Phone (account type Expenses, parent account Expenses)
Account name Electricity (account type Expenses, parent account Expenses)
Account name Rent (account type Expenses, parent account Expenses)
Account name Groceries (account type Expenses, parent account Expenses)
Account name Taxes (account type Expenses, parent account Expenses)
Account name Federal (account type Expenses, parent account Expenses:Taxes)
Account name Social Security (account type Expenses, parent account Expenses:Taxes)
Account name Medicare (account type Expenses, parent account Expenses:Taxes)
Account name Opening Balance (account type Equity, parent account Equity)
After you have created these additional sub-accounts, the end result should look like below
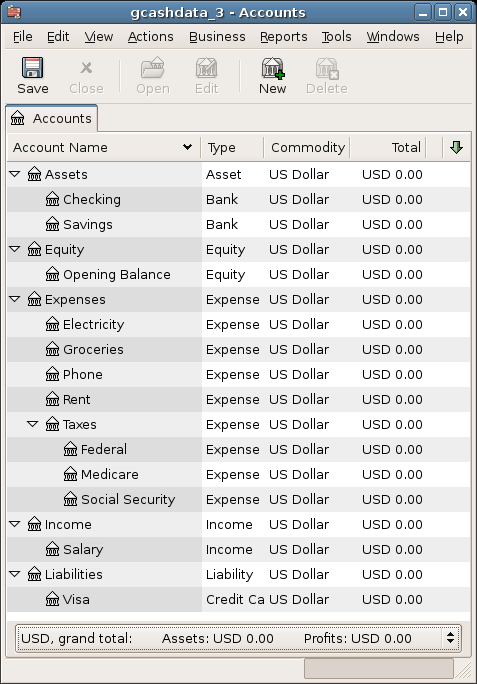
This image shows a simple chart of accounts.
Save this chart of accounts with the name gcashdata_3, as well as gcashdata_3emptyAccts, as we will continue to use them in the later chapters.
You have now created a chart of accounts to track a simple household budget. With this basic framework in place, we can now begin to populate the accounts with transactions. The next chapter will cover this subject in greater detail.