 | 注意 |
|---|---|
This section begins a tutorial that will continue throughout this book. At the end of each chapter, you will see a Putting It All Together section that walks you through examples to illustrate concepts discussed in that section. Each Putting It All Together section builds on the previous one, so be sure to save your file for easy access. | |
Let's get started!
First, let's create a file to store your real data. Open GnuCash and go through the New Account Hierarchy Setup dialog. You will create a file and accounts to be used for your home finances, so choose the accounts that pertain to you. If you are not sure what accounts you will need, click the Select All option to create all of the accounts provided. When you have completed the setup, save this file with a filename you want to use for your home data.
Next, create a file to store test data. This is the file that will be used in the tutorials throughout this manual. Click File -> New to create a new file, and name it gcashdata_1. Your main window should now look something like this:
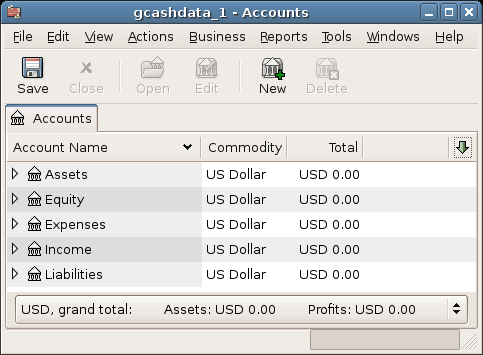
This image shows the Account Tree window with a set of accounts loaded from the druid.
Now, adjust some preferences in the account tree window. Select Edit -> Preferences -> Windows and change the toolbar Style so that they display only text, not icons. The change will take place directly, so look at the tool bar buttons in the main window. Return to the Preferences dialog and change the tool bar buttons back to the default setting by clicking Use system default. From the column header row, select Arrow down and select 「Type」 (which means view column "Type"). The main window should now look like this:
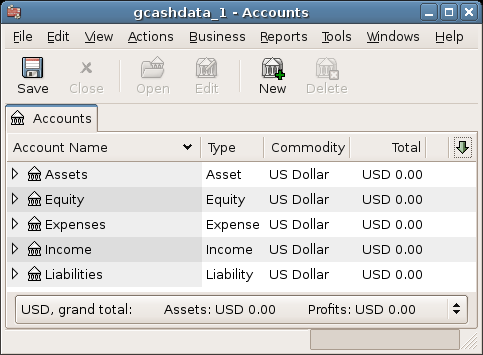
This image shows the effect of changing the display options.
Save your file.
If you plan to import QIF data from another program, let's try a practice file first. (If not, skip to the next chapter on account setup (第3章).)
First, create a new file called gcashimport. It is up to you if you would like to specify accounts (like Common Accounts) directly or not. If QIF importer do not find an account, it will create it automatically (or allow you to create it manually)
From the main menu, select File -> Import -> Import QIF... to start the import.
Select the appropriate currency
Select gnc_Sample_QIF.qif as QIF file to load.
In the following dialogs, ensure that each transaction has a valid account, if in doubt, just use the default ones.
Complete the import.
The main window should now look like this:
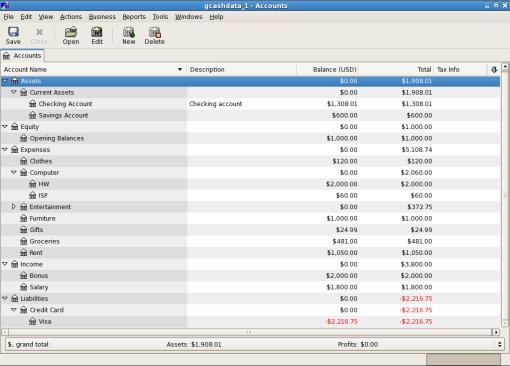
This image shows the Main window after importing the provided QIF sample file.
If after the import the screen is blank, go to File -> New -> New Accounts page to display a new Accounts tab.
Save your file.